rest api로 spring boot + S3 버킷 이미지 업로드
뷰, AWS S3 SDK를 이용했던 방식에서 이번에는 Rest api로 구현해 보았습니다.
본 글은 S3가 만들어져 있다는 가정 하에 작성하였습니다.
만일 S3 버킷이 없으시다면 맨 아래 블로그 링크 참고하시길 바랍니다.
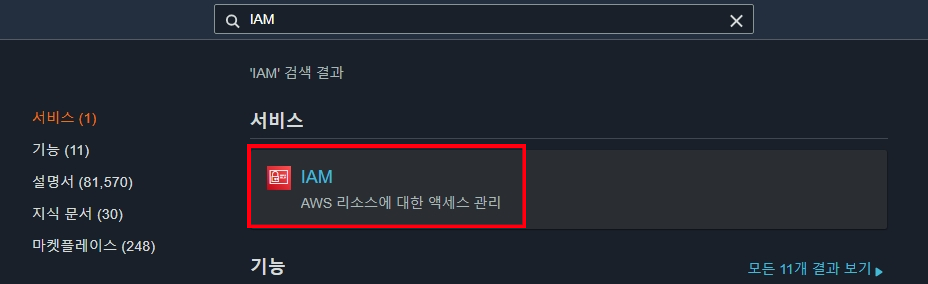
1. 접근키를 받기 위해 IAM 설정으로 이동합니다.
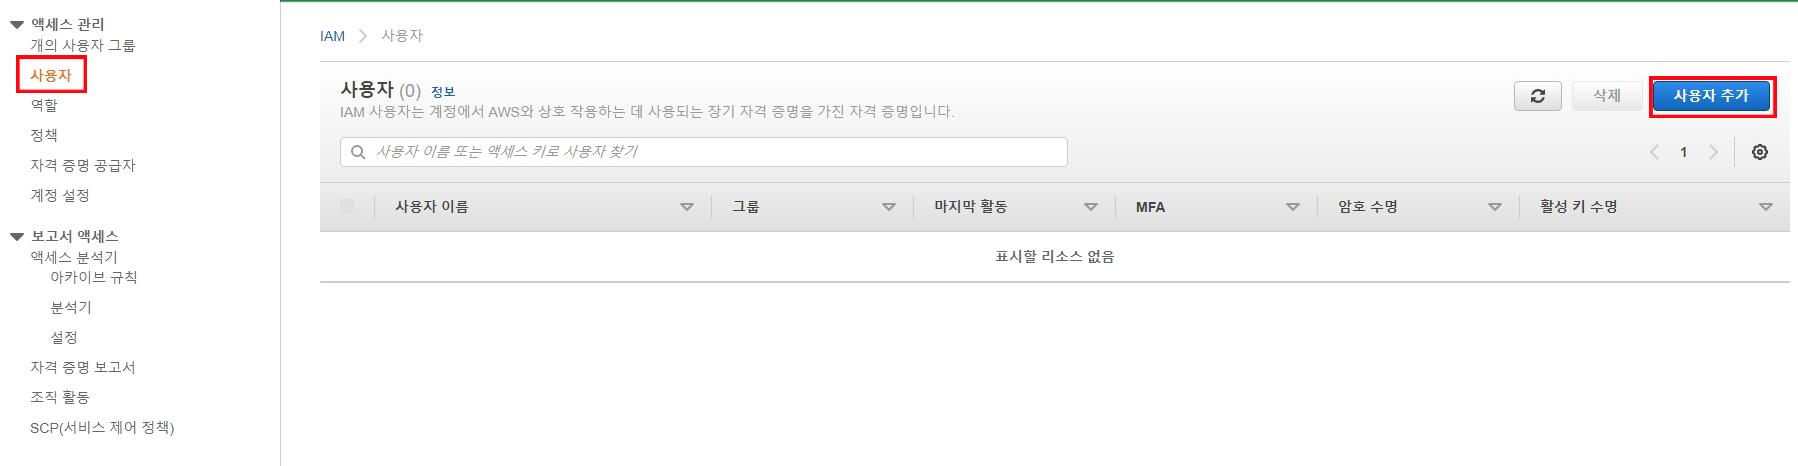
2. 사용자를 추가합니다.
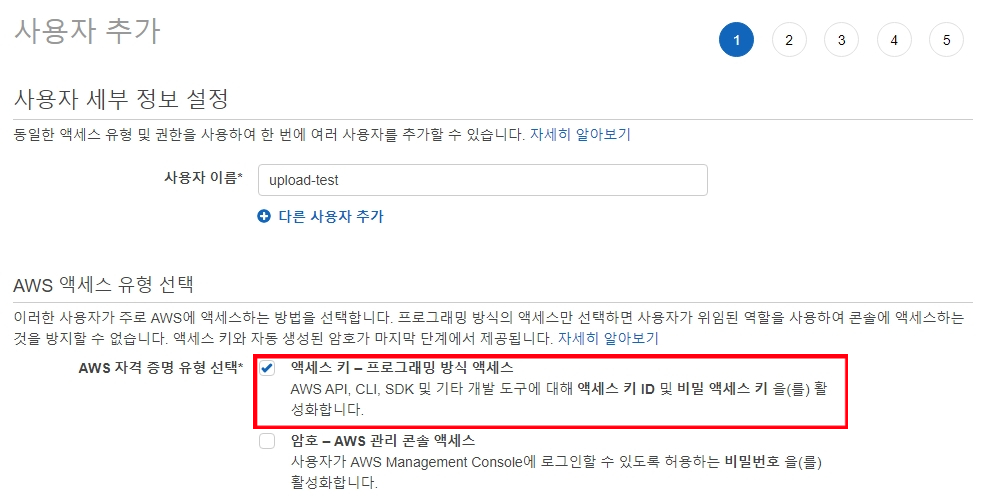
3. "프로그래밍 방식 액세스" 클릭
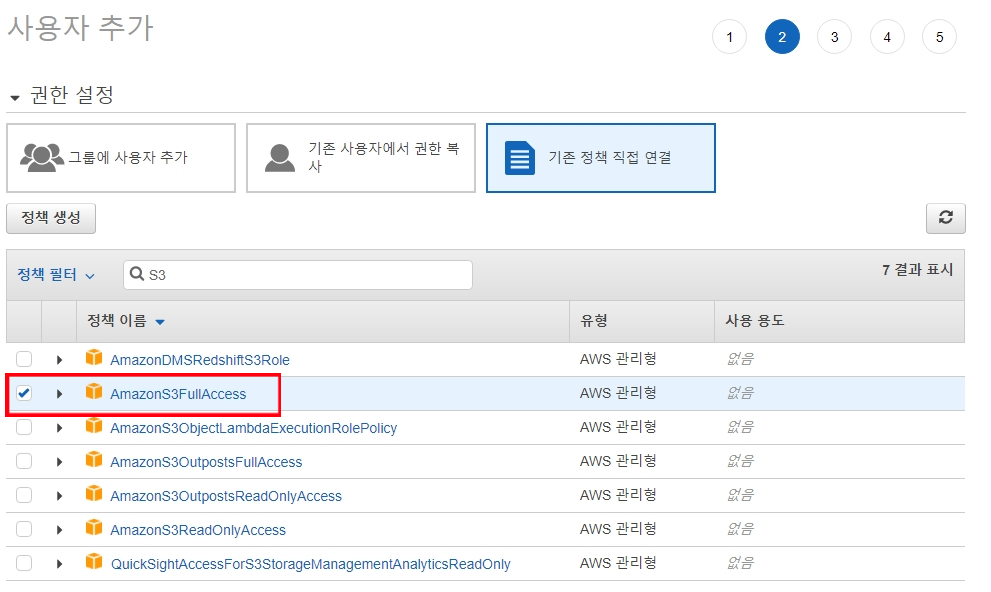
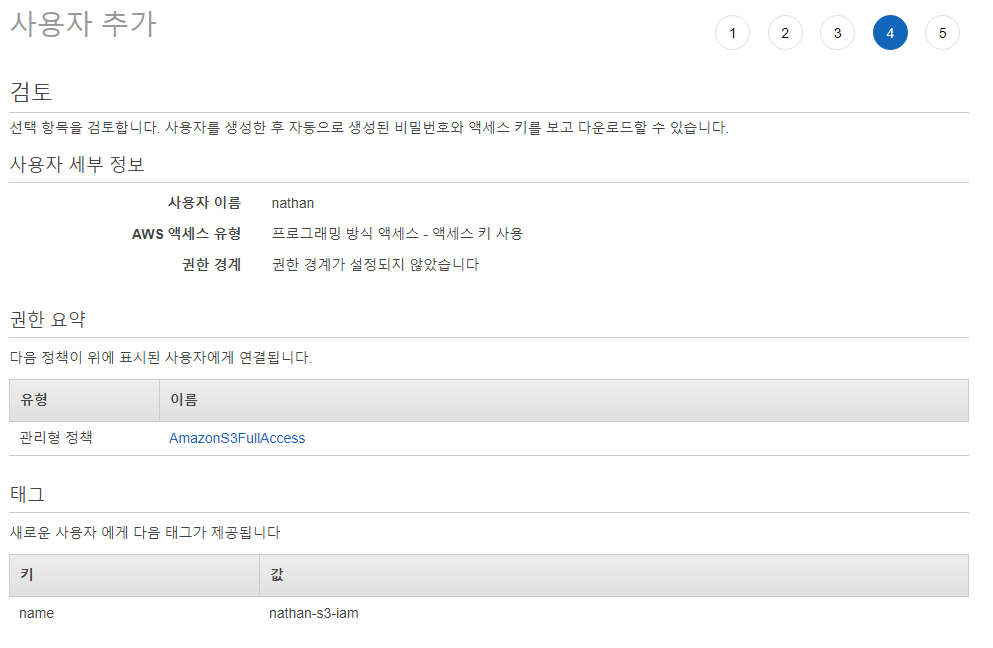
4. 정책을 연결합니다.
- S3와 관련된 접근권한이 필요하므로 "'AmazonS3FullAccess"를 선택합니다.
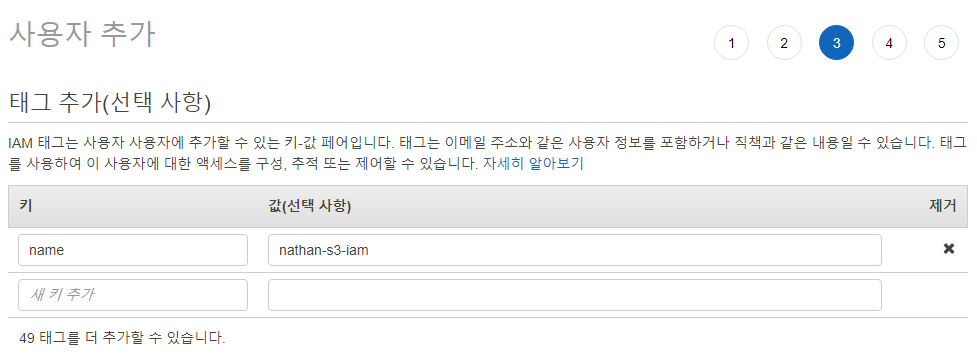
5. IAM 태그를 추가합니다.
- name의 키밸류를 설정했습니다.
6. 정상 구성되었는지 확인합니다.
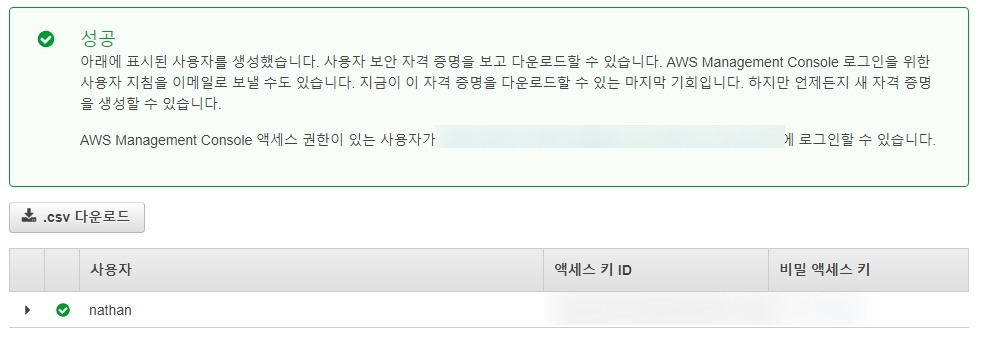
7. 액세스키 ID와 비밀 액세스 키를 따로 복사 해 둡니다.
8. 설정값 지정 후 코드를 작성할 차례입니다.

build.gradle
dependencies {
    // AWS cloud starter aws
	implementation('org.springframework.cloud:spring-cloud-starter-aws:2.2.6.RELEASE')

	// @ConfigureProperties를 사용하기 위해 추가
	annotationProcessor "org.springframework.boot:spring-boot-configuration-processor"
}
application-aws.yml
cloud:
  aws:
    s3:
      bucket: [버킷명]
    region:
      static: ap-northeast-2
    stack:
      auto: false
    credentials:
      instanceProfile: true
application-credentials.yml
cloud:
  aws:
    credentials:
      access-key: [IAM Access Key]
      secret-key: [IAM Secret Key]
application.yml
- aws와 credentials 프로필 등록입니다.
spring:
  profiles:
    include:
      - aws
      - credentials
.gitignore
- 중요정보는 git에 올라가지 않도록 .gitignore에 등록합니다.
application-aws.yml
application-credentials.yml
9. BasicController
- 컨트롤러 파트입니다.
@Slf4j
@RestController
@RequiredArgsConstructor
public class BasicUploadController {

	private final BasicUploadService basicUploadService;

	@PostMapping("/api/v1/upload")
	public String uploadImage(@RequestPart MultipartFile file) {
		return basicUploadService.uploadImage(file);
	}
}
10. BasicUploadService
- 업로드 형식이 달라질 때마다 유연하게 갈아끼울 수 있도록 중간에 인터페이스를 만들었습니다.
public interface BasicUploadService {
	String uploadImage(MultipartFile file);
}
11. S3UploadServiceImpl
- 실제 S3 이미지 업로드가 이루어지는 곳입니다.
(1) 확장자 유효성 검증 후 파일 이름을 생성합니다.
(2) 메타데이터, 파일 정보, 파일 내용을 저장 후 S3 버킷에 업로드 합니다.
(3) 최종적으로 반환된 URL을 return 해줍니다.
@Slf4j
@Service
@RequiredArgsConstructor
public class S3UploadServiceImpl implements BasicUploadService {

	private final AmazonS3 amazonS3;
	private final S3Component component;

	@Override
	public String uploadImage(MultipartFile file) {
		String filename = createFilename(file.getOriginalFilename());

		ObjectMetadata objectMetadata = new ObjectMetadata();
		objectMetadata.setContentLength(file.getSize());
		objectMetadata.setContentType(file.getContentType());

		try {
			InputStream inputStream = file.getInputStream();
			uploadFile(inputStream, objectMetadata, filename);
		} catch (IOException e) {
			throw new IllegalArgumentException("파일변환 중 에러 발생하였습니다.");
		}
		return getFileUrl(filename);
	}


	// ========== internal use ========== //
	private String createFilename(String originalFilename) {
		return UUID.randomUUID().toString().concat(getFileExtension(originalFilename));
	}

	private String getFileExtension(String filename) {
		try {
			return filename.substring(filename.lastIndexOf("."));
		} catch (StringIndexOutOfBoundsException e) {
			throw new IllegalArgumentException(String.format("잘못된 형식의 파일입니다."));
		}
	}

	private void uploadFile(InputStream inputStream, ObjectMetadata objectMetadata, String filename) {
		amazonS3.putObject(new PutObjectRequest(component.getBucket(), filename, inputStream, objectMetadata)
			.withCannedAcl(CannedAccessControlList.PublicRead));
	}

	private String getFileUrl(String filename) {
		return amazonS3.getUrl(component.getBucket(), filename).toString();
	}
}
12. S3Component
- S3 설정을 담당하는 파트입니다.
@Getter
@ConfigurationProperties(prefix = "cloud.aws.s3")
@Component
public class S3Component {

	private String bucket;

	public void setBucket(String bucket) {
		this.bucket = bucket;
	}
}
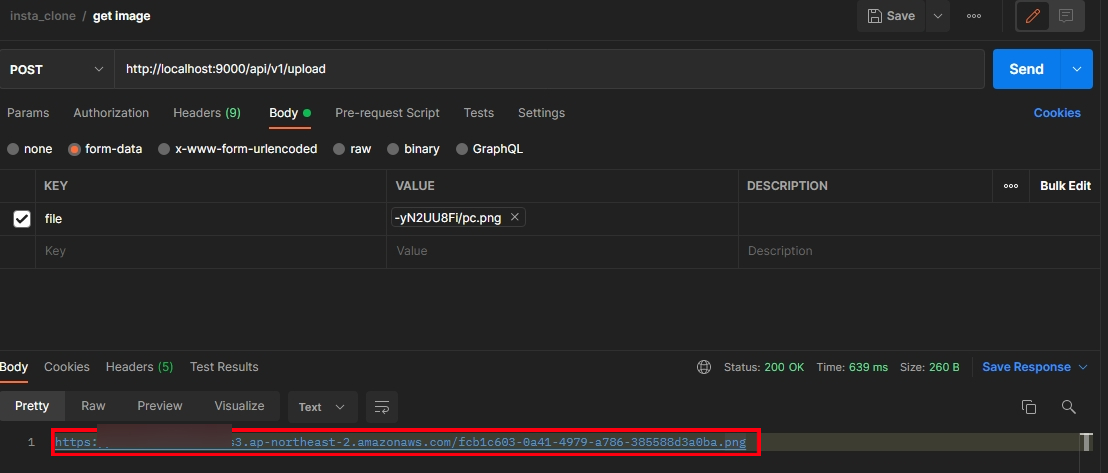
13. Postman 테스트
- S3 버킷에 등록된 이미지 URL이 반환된 것을 보실 수 있습니다.
- 프론트에서 해당 URL에 접근하도록 하면 됩니다.
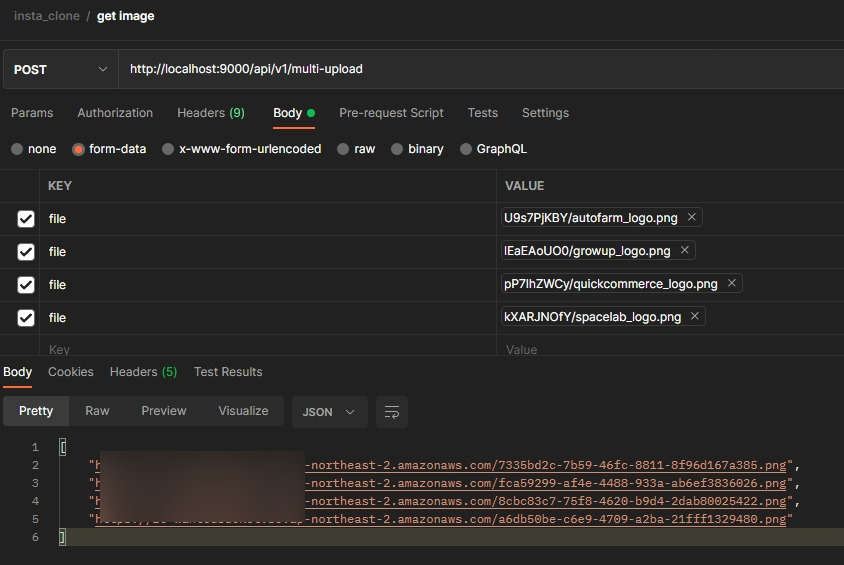
14. 이미지 여러 장 업로드
- Controller와 Service에서 코드를 추가하시면 여러 장 업로드가 가능합니다.
// BasicUploadController.java
@PostMapping("/api/v1/multi-upload")
public List<String> uploadImages(@RequestPart List<MultipartFile> file) {
	return basicUploadService.uploadImages(file);
}


// S3UploadServiceImpl.java
@Override
public List<String> uploadImages(List<MultipartFile> file) {
	return file.stream()
		.map(this::uploadImage)
		.collect(Collectors.toList());
}
위 내용은 아래 블로그를 참고하여 작성한 게시글입니다.
상세한 설명 혹은 S3 버킷 생성에 관련한 정보는 아래 글을 참고하여 주시기 바랍니다.
감사합니다.
참고
[1] https://willseungh0.tistory.com/2
Spring boot를 이용한 AWS S3에 파일 업로드하기 (2021.08.29 업데이트)
서버를 개발하시면 프로필 사진 업로드 등 파일을 업로드해야 하는 상황이 발생합니다. 간단한 샘플 코드로 AWS Cloud Starter AWS을 이용해서 AWS S3 버킷에 파일을 업로드하는 샘플 예제입니다. 준
willseungh0.tistory.com
[2] https://willseungh0.tistory.com/15
Spring boot를 이용한 AWS S3에 파일 업로드하기 (2021.08.29 업데이트)
서버를 개발하시면 프로필 사진 업로드 등 파일을 업로드해야 하는 상황이 발생합니다. 간단한 샘플 코드로 AWS Cloud Starter AWS을 이용해서 AWS S3 버킷에 파일을 업로드하는 샘플 예제입니다. 준
willseungh0.tistory.com